Evaluate used Link Belt bucket linkage parts through supported identification, written supplied scope and qualified condition findings. The time needed depends on the actual evidence and unresolved questions; a quick review cannot establish suitability by itself.
This guide walks through preparation, step-by-step checks, supplier screening, and a final purchase decision. Each stage gives you a clear finding you can act on. You will know what to ask for, what to accept, and when to walk away from used link belt excavator parts that fail the basics. Expect direct guidance on excavator parts evaluation.
Key Takeaways
Make sure the part is the right one and fits your machine before you talk about the price.
Ask for written papers that link the part to a donor machine and back up its condition.
Make sure you get a written list of what is supplied. It should show the parts, services, price, and terms.
Check the qualified condition findings that list the parts and include the inspector’s signature and date.
Pick a supplier you can trust. They should give clear records and answer your questions with real details.
Know Your Used Link Belt Excavator Parts
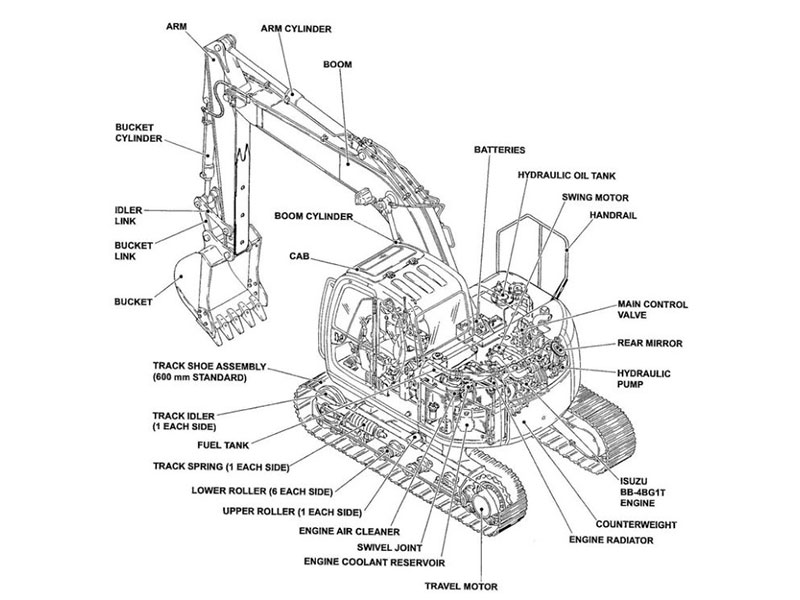
Map Components and Functions
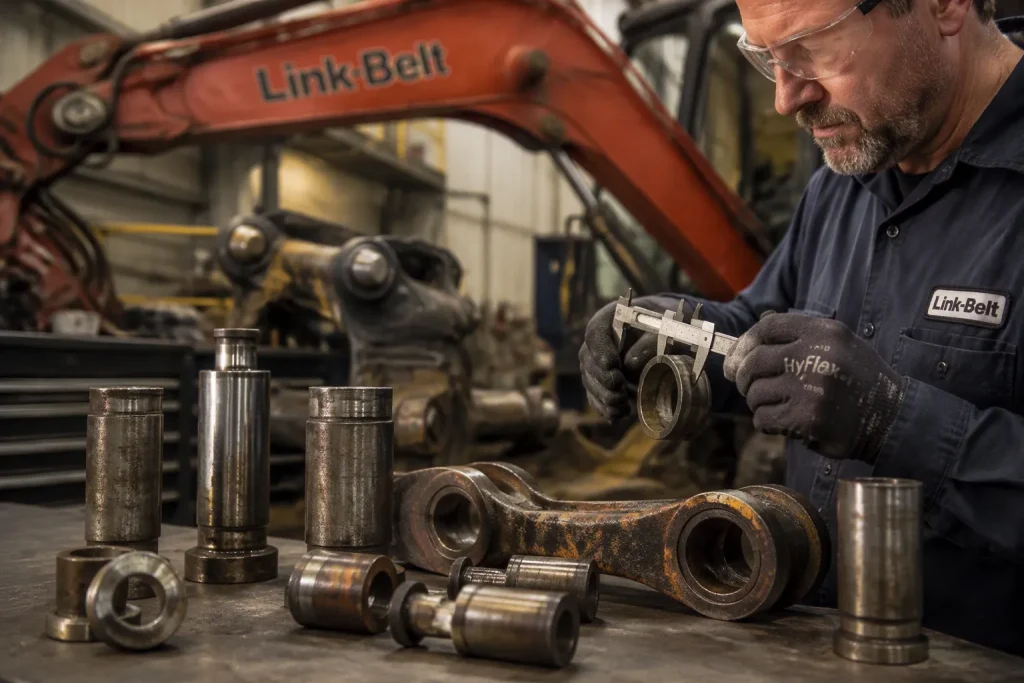
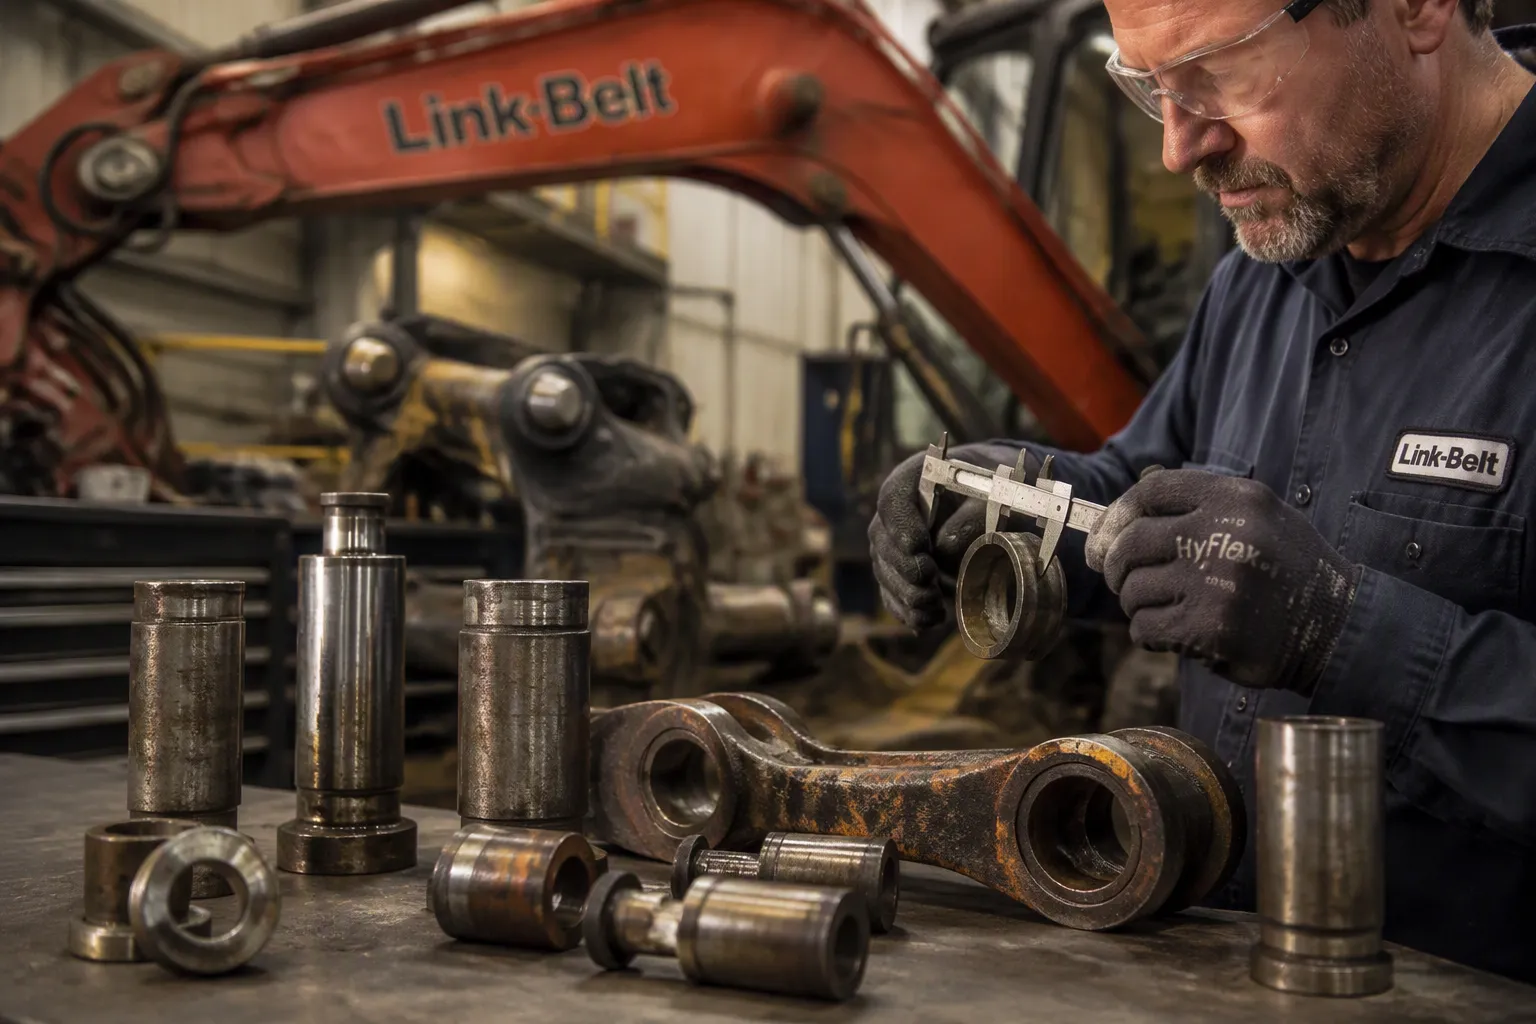
The bucket linkage on a Link Belt excavator is a simple assembly. Link arms connect the bucket to the stick and carry force from the hydraulic cylinder. Pins act as the pivot points at every joint. Bushings sit inside the pin bores and soak up movement between metal surfaces. Small linkage pins hold the smaller joints together and keep the assembly lined up under load. These parts work as a team. One worn pin or bushing changes how the whole assembly moves. That simple chain of parts controls every dig.
Linkage wear is a normal checkpoint on any used machine inspection checklist. You should expect a seller to talk about it directly. These are high-stress parts that see constant load cycles. That makes them key excavator components to check before you commit. A seller who skips this topic leaves a gap in the record. Good excavator parts records start with clear identity.
Confirm Identity and Compatibility
Record receiving machine identity and relevant configuration, plus donor information where available. Verify the proposed component reference using applicable documentation rather than requiring a donor machine to match yours exactly.
Compare the actual offered used, repaired or aftermarket alternatives through supported application, qualified findings and written scope. Labels do not establish tolerances, a standard price order or exact replacement suitability.
Verify Identification and Documentation
Identity work comes before price talk. A part with a clear paper trail is easy to place on your machine. A part with a vague story is a risk you carry after the sale. Treat this stage as a filter, not a formality.
Read Identification Markings
Record available markings and clarify their purpose. An ordering reference, casting mark and machine identifier can differ legitimately; investigate inconsistencies rather than requiring every visible number to equal the machine model.
Read the marking in context. A marking that identifies the assembly tells you what the part is. It does not tell you the part’s history. Ask the seller to explain how the marking ties to the donor machine. A seller who answers with a clear record earns trust. A seller who answers with guesses does not.
Do not assume a marking transfers across models. Confirm the application through the seller’s records and your own machine information. This habit keeps you from buying used link belt excavator parts that look right and fit wrong.
Request Supporting Documents
Documents turn a claim into a record. Request the following items in writing:
The donor machine model and serial number, as recorded by the seller.
The part number or reference the seller used to identify the assembly.
Any repair, rebuild, or rework records tied to the part.
The condition report, with the inspector’s name and the inspection date.
Quality documentation does not need to be elaborate. It needs to be specific and consistent. A rebuilt link arm should come with a record of the work performed and the parts replaced. Ask who did the work and what changed. Vague answers about a rebuild deserve a follow-up question.
Cross-check that records refer to the actual offered item and clarify differing identifiers or revisions. A marking may not be the ordering reference. Consistency supports review but does not prove condition or origin by itself.
Resolve essential identification and application questions before purchase. Missing donor history alone does not make every part unidentifiable; ask whether other supported records establish the offered item and application.
Keep copies of everything you receive. These records support your own maintenance file and help at resale. They also give you a fair basis for any later discussion with the supplier. Solid paperwork protects your budget and your schedule.
Insist on a Written Supply Scope
A verbal promise about what comes in the box means little after the invoice clears. Ask for the supply scope in writing. This document lists every item the seller will ship and every service the seller will perform. It turns a conversation into a commitment you can check.
Define What Is Included
The written scope should name each component in the assembly. List the link arms, pins, bushings, and related hardware by description. State whether the seller includes mounting hardware or ships the arms bare. A rebuilt assembly should carry a note on what the rework covered and which parts the shop replaced. Ask the seller to confirm the scope covers the full assembly, not a partial kit.
Spell out the terms alongside the parts list. The scope should state the price, the shipping arrangement, and the return conditions. Ask whether the seller offers any support if a part arrives outside the described condition. Put the answer in the same document. A clear scope protects your budget and gives you a fair basis for discussion later.
Accept nothing less than a written scope that lists parts, services, price, and terms in one document.
Match Scope to Machine
A scope only works when it matches your machine. Compare the listed components against your own model and application. Confirm the seller built the scope around your machine record, not a generic listing. Ask the seller to tie the scope to the donor machine details you verified earlier.
Watch for gaps between the scope and the condition report. The report should describe the same parts the scope lists. A rebuilt link arm in the scope should appear in the report with its rework noted. When the two documents disagree, ask the seller to reconcile them before you pay. Consistent paperwork marks a supplier who manages excavator parts with care. A sloppy scope signals risk for any excavator project.
Review Qualified Condition Findings
A condition report is the seller’s written record of how the part looks and how it has worn. Read it as a record, not a sales pitch. The report should name the link arms, pins, and bushings. These are standard wear checkpoints on any used excavator inspection, so a report that skips them is incomplete. Ask for the inspector’s name and the inspection date. A qualified report includes both.
What a Condition Report Covers
A useful report covers each component in the assembly. For the link arms, it should note the overall shape, any visible cracks, and the state of the pin bores. For the pins, it should describe surface wear and any scoring. For the bushings, it should state whether they are still in place and how they look at the load surfaces. These three items are common failure points on a bucket linkage. A report that covers them gives you a real basis for judgment.
Request documented repair scope and qualified findings against applicable component criteria. Do not assume a repaired item has different tolerances or that any tolerance is acceptable merely because it appears in a report. Real inspection photos may include useful markings.
Findings Versus Opinions
A finding states what the inspector observed. An opinion states what the seller hopes you will believe. “The bushing shows wear at the load surface” is a finding. “The linkage is in great shape” is an opinion. Train yourself to separate the two as you read.
Findings name the component, the location, and the observed condition. They tie back to the identification and documentation you already verified. Opinions use vague praise and skip specifics. When a report leans on opinions, ask the seller to restate the points as observations. A supplier who cannot do that has not done the work.
Treat any report without named components and an inspector’s signature as an opinion, not a finding.
Keep your evaluation inside these bounds. Do not run your own operating tests, open the assembly, or take internal measurements. Those steps belong to qualified service verification, not to a buyer’s desk review. Do not invent wear limits or remaining-life figures either. Judge the part on identification, documentation, and qualified findings. That trio tells you whether these used link belt excavator parts merit a closer look. A visual inspection of clear photos supports the report, and nothing more. Solid excavator parts records make the decision simple. Weak records on critical excavator components should end the conversation early.
Check Service History Records
Records That Add Confidence
Service records show how a part was used before it reached the listing. Ask for the maintenance history tied to the donor machine. A strong file includes the machine model and serial number, the part reference, and the dates of any repair or replacement work. Look for a record of post-rebuild testing when the seller offers rebuilt components. That record should name the shop, the date, and the checks performed. A rebuild without a test record leaves you guessing about the outcome.
An inspection record adds weight too. The report should name the inspector and the date, and it should cover the link arms, pins, and bushings. Pair that report with the identification documents you already verified. When the dates, models, and part references line up, you gain real confidence in the assembly. Consistent records also tell you the supplier manages excavator parts with discipline.
Gaps That Need Follow-Up
Gaps are common, and a gap is not automatic grounds to walk away. It is grounds for a question. Ask the seller to explain any missing repair record or any break in the timeline. A seller who answers with specifics earns trust. A seller who answers with guesses does not.
Ask for relevant missing records and have qualified personnel explain the effect of any unresolved findings. A clean paper trail does not guarantee certainty, and a lower budget does not justify an unresolved safety or compatibility issue.
Ask for every missing record in writing, and keep the answer with your file.
Choose a Reliable Excavator Parts Supplier
A reliable excavator parts supplier in North America does more than send a box. Good sourcing cuts downtime and helps your heavy machinery last longer. The right excavator parts supplier gives you records you can check before you pay. A weak one leaves you to fix problems on your own.
Build a Supplier Evaluation Checklist
Build your supplier evaluation checklist around four items. First, documentation practices: does the supplier link each part to a donor machine record? Second, written supply scope: does the supplier list parts, services, price, and terms in one document? Third, condition reporting: does the supplier give findings with an inspector name and date? Fourth, written terms: does the supplier put return conditions in writing?
Apply consistent questions to each quotation and review the support for the proposed part, actual condition and agreed terms. A claimed specialty is useful only when the evidence supports the actual application.
Questions for Any Excavator Parts Supplier
Ask direct questions and keep the answers. Which machine did this part come from? What part reference did you use? Who inspected it, and when? What does the written scope include? A reliable excavator parts supplier answers each one with specifics.
Ask how the offered linkage reference and assessed condition relate to your machine requirements. Request supported answers, while keeping application, condition and commercial terms distinct. Do not substitute an unrelated remanufacturing program for evidence about the actual linkage part.
Weigh Cost Against Service Life
Compare Total Cost
Price on the invoice is only one part of the cost picture. A worn link arm and pin replaced with an upgraded or changed part can cost far more than you expect. That surprise often shows up after the sale, when the new part demands matching hardware or extra shop time. Compare used and aftermarket options on total cost, not sticker price. Add the price of pins, bushings, and mounting hardware to each quote. Then add the labor to fit the assembly to your machine.
Compare actual alternatives on supported application, qualified condition findings, supplied scope and total expected cost. Do not infer quality, suitability or price order from used, repaired or aftermarket labels alone.
Judge Fit for Duty Cycle
Match the option to the work your excavator performs. A machine on light digging and grading tasks places modest demand on the bucket linkage. A machine on constant heavy digging loads the link arms, pins, and bushings hard. Ask how each option handles your workload, and let the seller answer with records rather than promises.
Use the intended service and applicable component requirements to assess each offer with qualified help. Light use, low machine hours or a short project does not make unresolved condition or compatibility concerns acceptable.
Excavator Parts Red Flags
Identity and Documentation Red Flags
Missing donor details, markings or references require investigation. Ask whether suitable alternative evidence identifies the actual offered item and supports its application.
Resolve conflicting records and clarify what each identifier represents. An incomplete history is an evidence limitation, not automatic proof that the part cannot be suitable.
Postpone a purchase if essential identity, application or condition remains unresolved.
Condition and Scope Red Flags
Read the condition report with a critical eye. A report that skips the link arms, pins, and bushings leaves out the standard wear checkpoints. Vague praise such as “good working condition” tells you nothing you can check. Demand findings with a component name, an observed condition, and an inspector’s signature and date.
Scope problems deserve equal attention. A verbal promise about included hardware means little after payment. Ask for the parts list, services, price, and terms in one written document. A rebuilt assembly with no rework record or test note raises a fair question about what the shop actually did. Treat any refusal to put scope in writing as a stop sign. These checks keep your excavator project on schedule and your budget intact. Solid records on excavator parts protect you at every stage.
Final Checklist and Written Terms
The Pre-Purchase Checklist
Run every part through the same checklist before you commit. Start with identity. Confirm the donor machine model and serial number, and match the marking on the part to the seller’s record. Move to documentation. Collect the part reference, the repair or rebuild record, and the condition report with the inspector’s name and date. Check that the documents agree with each other. Then review the written supply scope. The scope should list the link arms, pins, bushings, and hardware, plus the price and terms. Finish with the condition findings. The report should name each component and describe what the inspector observed.
Use the checklist to record satisfied requirements, open questions and necessary follow-up. A clean test record alone is not a universal pass, and a missing historical record need not prove failure where other supported evidence resolves the essential questions.
Put Acceptance Terms in Writing
Acceptance terms belong in the same document as the supply scope. State what you will accept and what you will reject. Name the components the seller must ship, the condition each one must meet, and the records that must arrive with the part. Add the return conditions and the process for resolving a mismatch. A pre-delivery check of these terms before payment keeps the deal clean.
Ask the seller to sign the terms alongside the scope. Keep your copy with the condition report and the identification records. When a part arrives outside the agreed condition, the written terms give you a fair basis for discussion. These excavator parts carry real load, so the paperwork deserves the same care. A clear acceptance record protects your excavator project from surprises.
You now have a clear plan. Know the assembly and whether it fits your machine. Check the identity and the paperwork. Ask for a written supply scope. Review qualified condition findings. Screen the supplier. Compare cost against service life. Finish with a checklist and written terms.
Base the decision on supported application and qualified findings. Keep unresolved essential questions visible rather than assuming that paperwork alone guarantees safety or value.
Retain the identification file, condition findings, quotation and written acceptance terms together.
FAQ
How do I confirm a used linkage part fits my machine?
Verify the proposed reference using documentation applicable to the receiving machine and configuration. Donor and receiving serial numbers need not match. Clarify the purpose of each component marking and any supported supersession.
What should I do when the seller has no rebuild record?
Request relevant repair scope and qualified condition evidence for the actual item. Missing history limits what is known, but a written list of unknowns does not make an unresolved safety or compatibility issue acceptable.
Are photos enough to judge condition?
No. Photos support a qualified condition report, but they do not replace it. The report should name the link arms, pins, and bushings, and it should carry an inspector’s name and date. Treat clear, unbranded images as backup evidence, not as the finding itself.
What if the part arrives outside the agreed condition?
Check the delivery against your written acceptance terms first. Photograph the part and the packaging before you move it. Contact the supplier with the scope, the condition report, and your images. The written terms give you a fair basis for the discussion. Keep every record in your file.
Can I test the linkage myself before buying?
No. Skip operating tests, disassembly, and internal measurements. Those steps belong to qualified service verification. Evaluate the excavator parts on identification, documentation, and qualified findings instead. That trio tells you whether the assembly merits a closer look, and it keeps your excavator project safe.
For excavator parts sourcing, consider YNF Machinery. Share full machine and component identification, applicable part references and quantities, and request supported compatibility information, an actual quotation, and written warranty and return terms before ordering.