Inspect Volvo excavator filters, fluids, undercarriage parts, belts, hoses and seals using the actual machine and engine service instructions. Recorded findings help plan maintenance and detect conditions that need qualified attention.
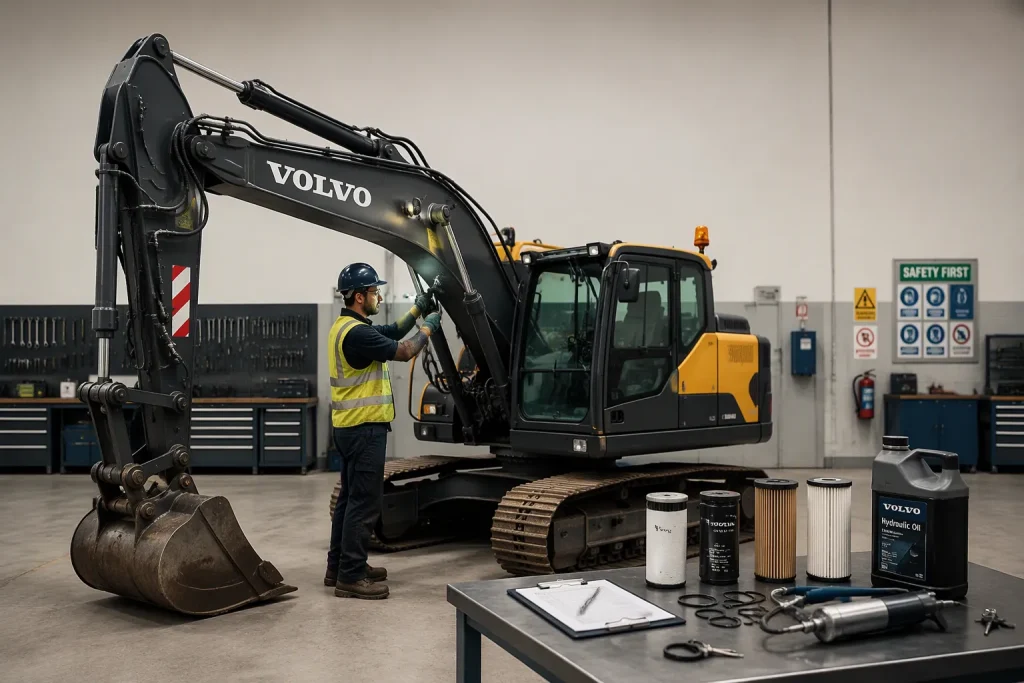
You know which parts to inspect. Do you know how to inspect them safely? A safe routine is just as important as the parts list itself. Good maintenance habits protect you and your machine. Skilled preventive maintenance keeps your excavator running strong day after day.
Key Takeaways
Use the manual’s pre-use checks, maintenance intervals and operating-condition adjustments.
Isolate the machine, release stored pressure, and always support it safely to prevent injury.
Noises, leaks, and warning lights are signs of a problem. A trained technician can find the real cause.
Swap out worn parts early. This stops more damage. Write down each inspection to find patterns.
Confirm the actual replacement application and required specifications before ordering.
Volvo Excavators Parts and the Excavator Inspection Checklist
Use the pre-use and maintenance checklist for your exact machine. An on-screen reminder may be available on some models, but does not replace the applicable manual.
Inspection area | What to Check |
|---|---|
Engine oil level | Use the specified level-check procedure and interval |
Coolant level | Use the specified safe level-check procedure and interval |
Hydraulic oil level | Use the specified level-check conditions and interval |
Water separator | Drain only as directed by the applicable engine or machine instructions |
Air cleaner | Check restriction indicator |
Follow the actual schedule for oil, coolant, hydraulic fluid and any installed water separator. Inspect visible leakage from a safe position. A small fluid film or seep does not by itself establish the underlying cause.
Filters: Air, Fuel, and Hydraulic
Follow the prescribed air-cleaner indicator, inspection and replacement procedure. Avoid introducing contamination when servicing the housing. Smoke or loss of power has several possible causes and does not alone diagnose an air-filter fault.
A restricted fuel filter is one possible cause of difficult starting or power loss. Use the actual service procedure and qualified diagnosis rather than assuming the filter or a seal is the cause.
Use the specified hydraulic filter type and service interval. Filter bypass design and warning arrangements vary; operating symptoms alone do not establish filter failure or pump damage.
Fluids: Engine Oil, Coolant, and Hydraulic Oil
Fluids, filters and grease form the backbone of any excavator maintenance plan. Fresh engine oil protects bearings and moving parts. Coolant controls temperature and prevents corrosion inside the block. Clean hydraulic oil carries power through every circuit. Contaminated oil wears pumps, valves, and cylinders from the inside out.
Use the prescribed fluid types, intervals and safe level-check conditions. Unusual fluid appearance or debris warrants further assessment; appearance alone is not a definitive diagnosis.
Record the required fluid, filter, track, belt, hose and seal checks using the applicable manual. Adjust the schedule only according to approved guidance and operating conditions.
Undercarriage Excavator Parts: Track Tension and Wear
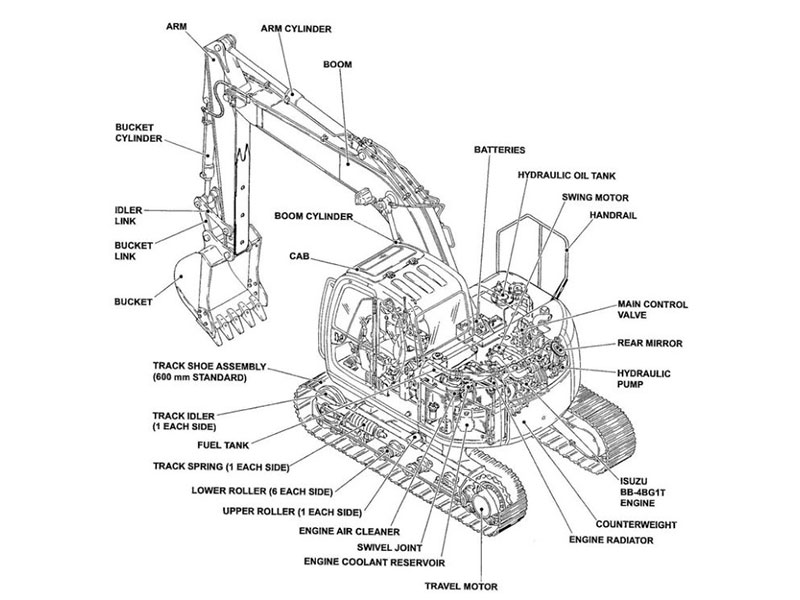
Checking the undercarriage often stops downtime and makes the machine last longer. The undercarriage takes the hardest hits on any excavator. Mud, rocks, water, and steady impact wear down parts every day. Finding small problems early stops big repairs.
Track Tension Checks Using the Applicable Schedule
Incorrect track tension can increase wear or the risk of derailment. Use the actual adjustment method and service limits; do not apply a universal weekly schedule.
Measure sag under the prescribed setup and record the result. Unexpected changes warrant inspection; do not assume one universal cause.
Inspect track fasteners as directed by the manual. Refer missing, damaged or loose fasteners to qualified service personnel and use the specified replacement and installation requirements.
Inspect Rollers, Idlers, and Sprockets
Cracks, leakage, abnormal wear or failure to rotate warrant qualified assessment. Determine the repair scope using the applicable service limits rather than assuming every visual finding requires immediate replacement of the same part.
Component | Condition to inspect | Decision basis |
|---|---|---|
Bottom track rollers | Tread diameter reduction; flange wear | Compare measurements with the actual roller service limits |
Top carrier rollers | Tread flat spots; seizure | Use the applicable wear and rotation criteria |
Front idler | Center tread wear; side-guide thinning | Refer cracks to qualified assessment before operation |
Sprockets | Knife-edge tooth profiles; root-pocket gouging | Assess sprocket and related track condition together |
Inspect related undercarriage components as a system. Use measured condition and the actual service limits for replacement decisions; visible wear alone is not a universal threshold.
Abnormal travel noise or vibration warrants investigation. These symptoms can have several causes and cannot alone identify a particular failed roller, sprocket or flange.
Preventive maintenance keeps your undercarriage working reliably. Daily checks help you catch wear patterns early. Your excavator parts last longer when you fix wear.
Belts, Hoses, and Seals: Common Excavator Maintenance Items
Filters, belts, hoses and seals are common maintenance items, but replacement frequency and consequences vary by machine and application. Use the actual service schedule and diagnostic findings.
Look for Cracks, Glazing, and Loose Belts
Inspect belt condition using the manual’s isolation and inspection procedure. Measure or adjust tension only by its specified method and limits; avoid moving belts and pinch points.
You should listen for squealing at startup. That noise often points to a loose or glazed belt. A trained person must confirm whether the cause is normal wear, misalignment, or too much pressure. Do not think the belt itself is at fault. A worn pulley or a misaligned part can destroy a new belt in a short time.
Check Hoses and Seals for Leaks and Hardening
Inspect visible hose damage and leaks safely. Do not feel for a high-pressure leak with your hands or bend a pressurized hose. Stop operation when a defect presents a safety risk and obtain qualified service.
Leakage or changes in operation can warrant hydraulic or seal assessment. The actual seal, circuit and repair requirements must be identified; symptoms do not establish normal wear, misalignment or pressure as a single cause.
Safe Maintenance Tips for Daily and Weekly Excavator Checks

Safety starts before you touch any part. You must isolate the machine, release stored pressure, and secure support so it cannot move or drop. This step protects you from crushing, burns, and injection injuries.
Isolate, Release Stored Pressure, and Secure Support
Use the employer’s approved energy-control procedure and the machine’s service instructions for the planned work.
Personnel must be trained for the isolation and verification steps required by that procedure.
Identify and control the actual hazardous energy sources, secure attachments and supported components, and manage stored energy using the approved procedure. Qualified personnel should verify a safe condition before service; a general article is not a complete lockout or pressure-release procedure.
Follow a Daily, Weekly, and Parts-Based Routine
Build the routine from the actual pre-use checklist and scheduled service requirements, including operating-condition adjustments.
Record the specified fluid, filter, track, belt, hose, structural and battery checks. Perform each only using its approved shutdown, isolation and handling procedure. Refer defects beyond the operator’s inspection scope to qualified personnel.
Daily checks, proper lubrication, and cleaning help you spot problems early. They extend hydraulic and undercarriage life. A clean machine shows leaks faster. Fresh grease pushes out contamination. These maintenance tips build a habit that pays off over time.
Consistent preventive maintenance does more than protect parts. It protects your schedule and your crew. When you follow a fixed routine, you stop guessing about what needs attention. You know. That confidence keeps your machine working and your job site safe.
Maintain records of the prescribed inspections and follow up on defects. The schedule and required checks depend on the actual machine, engine and operating conditions.
Symptoms vs. Confirmed Causes in Worn Excavator Parts
Noises, leaks, vibrations, and warning lights are symptoms. They show you something is wrong, but they do not tell you what. A whining pump could mean contamination, worn seals, or a filtration problem. A slow boom could point to a failing cylinder or a clogged hydraulic filter. Treat every warning sign as a question, not an answer. Only a proper inspection confirms the root cause.
Excavator Part | Possible areas to investigate; not confirmed causes | Warning Signs (Symptoms) |
|---|---|---|
Hydraulic System | Hose leaks, pump wear, fluid contamination | Slow or jerky movement, unusual noises |
Undercarriage | Track shoe wear, roller damage, idler wear | Unusual vibration, track slip or derailment |
Engine | Air filter clogging, fuel system issues | Hard starting, black smoke, power loss |
Swing Motor | Seal failure, bearing wear, internal leaks | Slow or jerky rotation |
Final Drives | Seal leaks, gear wear, hub damage | Oil leaks at drives, sluggish travel |
Recognize Warning Signs That Need Follow-Up
Unexpected noise, heat, smoke or vibration requires assessment. Do not order bearings or other components based on one symptom; follow the machine’s warning and shutdown instructions.
Persistent leakage or starting problems require diagnosis. Do not repeatedly tighten pressurized connections or continue operating with an unsafe defect.
Call Qualified Personnel for Hydraulic and Structural Diagnosis
Hydraulic and structural diagnosis is a job for qualified personnel. Look for a technician with hydraulic systems certification or advanced hydraulic training. Volvo manufacturer training helps, because it covers service procedures for specific models. Recognized certifications also show competence. Practical experience matters too. A technician with substantial experience repairing heavy construction or diesel equipment brings real diagnostic skill. Strong troubleshooting ability and the ability to read hydraulic and electrical schematics are core capabilities. Welding and fabrication experience supports structural inspection and repair. Hand these jobs to a trained person. Your maintenance routine stays safer, and your excavator parts last longer.
Replacement Guidelines and Preventive Maintenance Habits
Replace Worn Parts Before Secondary Damage Occurs
A failed component can affect related systems, but the actual damage and repair scope require diagnosis. Do not assume every pump, belt, seal or hose failure has the same consequence.
Before they harm other parts, you should replace worn parts. Never wait for a complete part failure. Preventive maintenance means you catch problems before they start. This approach avoids costly repairs and cuts unplanned downtime.
Worn Part | Connected-System Failure | Secondary Damage |
|---|---|---|
Hydraulic pump | Pump fails | Hydraulic circuit gets dirty |
Serpentine belt | Belt breaks | Loss of the accessory functions driven by that belt; application varies |
Seal | Loses strength | Leakage or contamination risk depends on the actual seal application |
Hydraulic hose | Hose breaks | Fluid release and loss of the affected hydraulic function; safety risk |
Do not use one-size-fits-all replacement intervals. Use the schedule in your operator’s manual and follow it.
Log Inspections and Verify Replacement Application
Keep a list of every inspection and replacement. Write down the date, the part, and what you found. Patterns become easier to see in this log. You can order spare excavator parts before a breakdown stops your job.
Confirm ordering numbers, serial application, installed configuration and required specifications. OEM or aftermarket branding alone does not establish fitment, performance or warranty coverage.
Record filter, belt, hose and seal findings according to the actual schedule. Verify replacement application before ordering and retain compatibility information and written terms.
Check filters, fluids, undercarriage parts, belts, hoses, and seals regularly to protect your machine and your schedule. Safety first: always isolate the machine, release stored pressure, and secure support before any inspection. Treat noises, leaks, and warning lights as symptoms that need a confirmed cause. Let qualified staff handle hydraulic and structural diagnosis.
Maintenance Record Checks
Use the Actual Service Schedule
Record Condition and Follow-Up Actions
Follow the Approved Filter Service Procedure
Keep inspection and replacement records so future orders use verified identification and actual service history.
FAQ
What daily fluid checks should you perform?
Use the manual’s pre-use checks and safe fluid-level procedures. Drain an installed separator only as directed. Report abnormal levels or leakage for assessment.
When should you replace the air filter?
Follow the actual air-cleaner indicator and service procedure, including any specified inspection or interval requirements. Smoke or power loss alone does not establish filter restriction.
How does track tension affect undercarriage wear?
Incorrect tension can increase undercarriage wear and derailment risk. Measure and adjust using the actual manual’s conditions and limits; investigate unexpected changes.
What should you include in a preventive maintenance routine?
Use the applicable machine and engine pre-use checklist, service intervals and operating-condition adjustments. Record findings and completed work, and arrange qualified service for defects outside the operator’s scope.
Who should diagnose hydraulic problems?
Leave hydraulic or structural diagnosis to a qualified technician. Noises, leaks, and warning lights are symptoms, not confirmed causes. A trained person can read schematics, find root issues, and prevent secondary damage. This keeps your routine safe.
For Volvo excavator parts sourcing, consider YNF Machinery. Provide full machine and component identification, applicable part numbers and quantities, and request supported compatibility information, an actual quotation and written warranty and return terms before ordering.