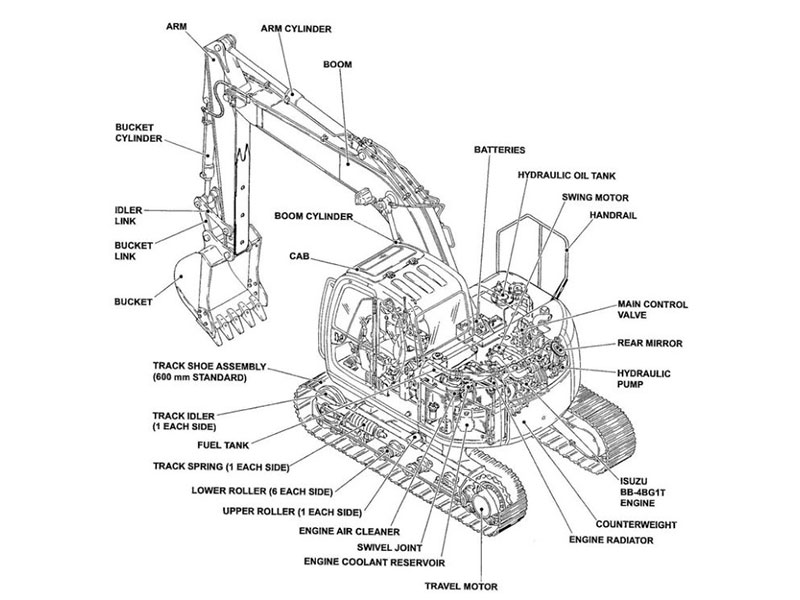
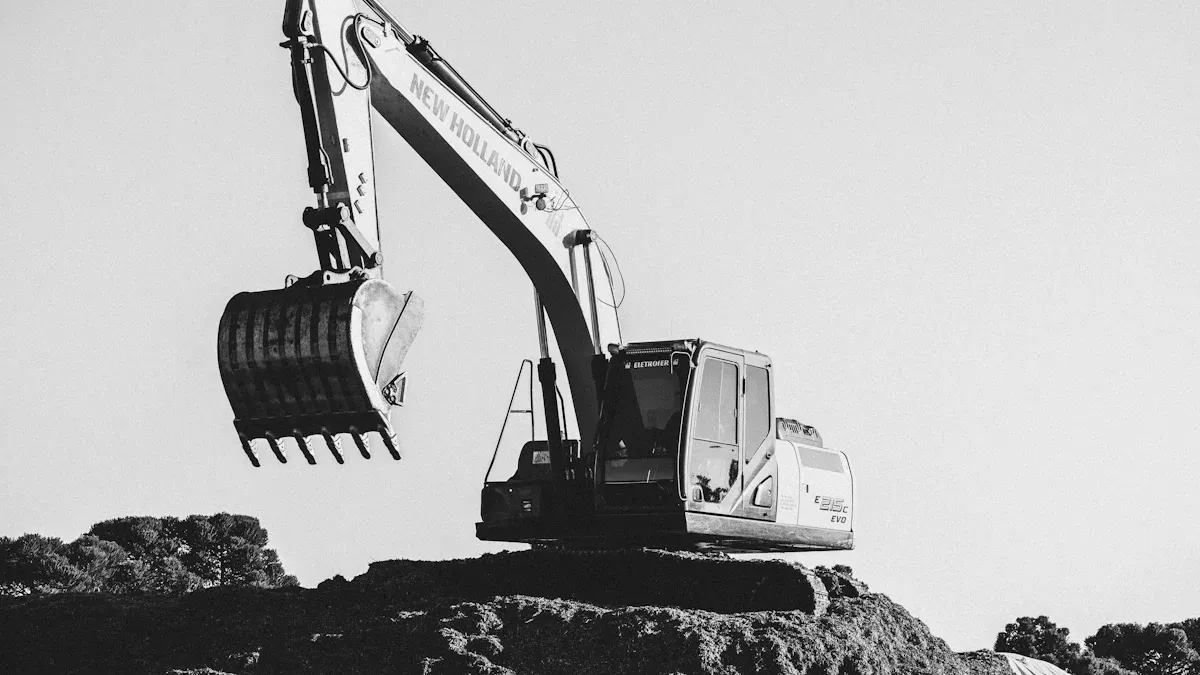
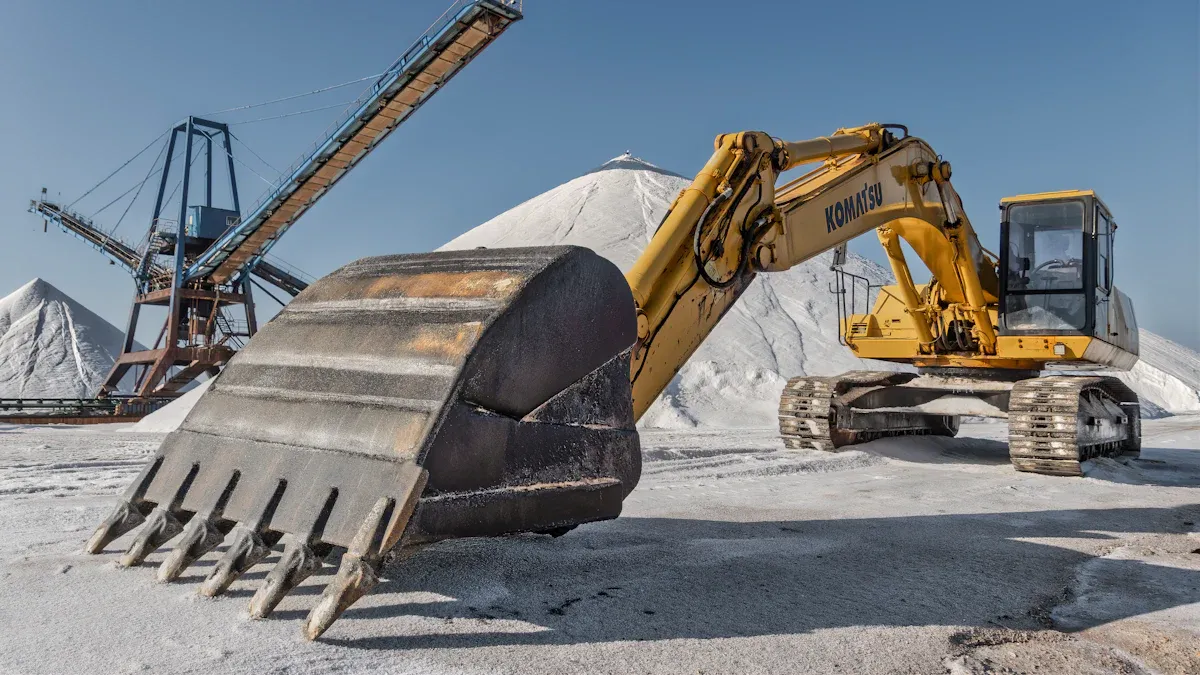
An excavator bucker parts diagram displays the main components of the bucket and illustrates how each part fits together. By using an excavator bucker parts diagram, you can easily identify every part of the bucket, including the shell and the teeth. These diagrams are helpful for measuring the bucket accurately and for finding the correct parts needed for repairs. When examining an excavator, understanding the bucket layout through an excavator bucker parts diagram is very useful. It assists you in choosing the best bucket for your specific job. Many beginners find that an excavator bucker parts diagram makes learning much easier.
Key Takeaways
Excavator bucket parts diagrams show all main bucket parts. They also show how the parts fit together. This helps you learn and spot each part easily.
These diagrams help you measure buckets the right way. They help you pick the best bucket for your job. They also help you find the right parts for fixing.
Main bucket parts are the bucket body, teeth, side cutters, cutting edge, wear plates, pins, and bushings. Each part has a special job in digging and making the bucket last longer.
Use the diagram for regular care, like checking teeth. Grease pins and bushings often. Change old parts to keep your excavator safe and working well.
Do not make common mistakes. Always read the diagram carefully. Check part numbers and match parts to your machine. This makes sure everything fits and works right.
Excavator Bucket Diagram Basics
What Is an Excavator Bucket Diagram
You may wonder what an excavator bucker parts diagram actually shows. This diagram gives you a clear picture of all the main parts that make up the bucket on an excavator. You will see the bucket shell, teeth, side cutters, and other important pieces. Each part appears in its correct place, so you can understand how everything fits together.
When you look at an excavator bucker parts diagram, you get a map of the bucket’s structure. This map helps you see the relationship between the bucket and the rest of the excavator. You can spot the pins and linkages that connect the bucket to the machine. You also notice how the hydraulic system moves the bucket during digging.
Tip: If you are new to working with excavators, start by studying the diagram. It will help you learn the names and shapes of each part.
Why Diagrams Matter
You need to use an excavator bucker parts diagram for several reasons. First, it helps you understand how the bucket works with the excavator. You can see which parts move and which parts stay still. This makes it easier to figure out how to use the bucket for digging, lifting, or carrying materials.
Second, diagrams help you measure the bucket. You can find the width, height, and depth by looking at the labeled parts. This is important when you want to replace a bucket or choose the right size for your job.
Third, an excavator bucker parts diagram helps you select the correct parts for repairs. If a tooth or pin breaks, you can use the diagram to find the exact part you need. This saves you time and money because you avoid buying the wrong part.
Benefits of Using a Diagram:
You learn the structure of the bucket.
You measure parts quickly and accurately.
You identify and order the right replacement parts.
You make better choices when selecting a bucket for your excavator.
Remember: Diagrams are not just for experts. You can use them to build your skills and confidence as you work with excavators.
Excavator Bucket Parts Diagram Overview
Main Parts Shown
When you look at an excavator bucker parts diagram, you see a clear picture of the main parts that make up the bucket. Each part has a special job. Understanding these parts helps you use your excavator safely and efficiently. Here are the key parts you will find in most diagrams:
Bucket Body: This is the main shell or frame of the bucket. It holds everything together and gives the bucket its shape. The bucket body takes most of the force when you dig or lift.
Teeth: These sharp points sit at the front edge of the bucket. Teeth help you break into soil, clay, or rock. You can replace them when they wear out.
Side Cutters: These parts attach to the sides of the bucket. Side cutters protect the bucket body and help you cut through tough material.
Adapters: Adapters connect the teeth to the bucket. They make it easy to change teeth when needed.
Cutting Edge: This is the lower front edge of the bucket. The cutting edge slices through the ground as you dig.
Wear Plates: These plates cover parts of the bucket that get a lot of friction. Wear plates protect the bucket and make it last longer.
Pins and Bushings: Pins hold the bucket to the excavator. Bushings help the pins move smoothly and reduce wear.
Note: Each part in the diagram has a label. You can use these labels to find the right replacement parts or to talk with a dealer about repairs.
Bucket and Linkage Components
The excavator bucker parts diagram also shows how the bucket connects to the rest of the machine. You will see the linkage system, which includes several important parts:
Linkage: This system connects the bucket to the stick and boom of the excavator. Linkage parts move when you use the controls in the cab. They help you tilt, curl, or lift the bucket.
Pins: These strong metal rods hold the linkage together. You can remove the pins to change buckets or other excavator attachments.
Hydraulic Cylinder: This part uses oil pressure to move the linkage and bucket. The cylinder lets you open and close the bucket with power.
A good excavator bucker parts diagram often shows how the bucket connects to the boom and stick. You can see where the hydraulic system attaches. This helps you understand how the bucket moves and how it works with other excavator attachments. If you want to switch buckets or add a new tool, the diagram shows you which pins and parts to remove or adjust.
If you study the diagram, you will see how each part works together. This knowledge helps you keep your excavator running smoothly and safely.
Bucket Anatomy and Functions
Bucket Shell
The bucket shell forms the main body of the bucket. You will notice that this part gives the bucket its shape and strength. The shell holds all other parts together. When you use heavy duty buckets, the shell must handle strong forces from digging and lifting. Trenching buckets have a narrow shell to dig deep, clean trenches. The shell’s design affects how much material you can move and how well the bucket fits your excavator.
Teeth and Adapters
Teeth sit at the front edge of the bucket. They help you break into hard soil, clay, or rock. Adapters connect the teeth to the bucket, making it easy to replace worn teeth. Most teeth and adapters use high-quality alloy steel. This steel contains elements like carbon, silicon, manganese, chromium, and aluminum. To make them last longer, manufacturers add microelements such as molybdenum and nickel. The surface hardness usually ranges from HRC46 to HRC52. The process uses lost wax casting and heat treatment for extra strength and wear resistance.
Material Element | Purpose |
|---|---|
Carbon (C) | Increases hardness |
Chromium (Cr) | Improves wear resistance |
Nickel (Ni) | Adds toughness |
Tip: Always check the teeth and adapters for wear. Replacing them on time keeps your bucket working well.
Side Cutters and Cutting Edge
Side cutters attach to the sides of the bucket. They protect the shell and help you cut through tough ground. You can find straight, curved, or serrated side cutters. Each type helps you with different jobs, like trenching or shaping edges. The cutting edge runs along the bottom front of the bucket. It uses hardened steel with a hardness of 400-450 BHN and a thickness between 12-24 mm. This edge lets you dig into the ground easily and protects the bucket from damage. Together, side cutters and the cutting edge improve your work quality and make your bucket last longer.
Wear Plates
Wear plates cover the parts of the bucket that face the most friction. You will see these plates on the bottom and sides of heavy duty buckets. They protect the shell from wearing out too fast. If you use trenching buckets, wear plates help the bucket keep its shape even after many hours of digging. You should check wear plates often and replace them when they get thin.
Pins and Bushings
Pins connect the bucket to the excavator’s arm. Bushings fit around the pins and let them move smoothly. These parts help you attach or remove the bucket quickly. If pins or bushings wear out, the bucket may not move correctly. You should grease these parts often to keep your bucket working safely.
Note: Keeping pins and bushings in good shape helps you avoid costly repairs and keeps your excavator running smoothly.
How to Read an Excavator Bucket Diagram
Diagram Layout
When you look at a bucket diagram, you will see a clear layout. Most diagrams show the bucket from the side or top. The drawing highlights each part, such as the shell, teeth, and pins. You may notice lines pointing to each part with labels. This layout helps you find the parts quickly. Some diagrams also include a small chart or legend. The legend explains what each symbol means. You can use the diagram as an installation guide when you need to put the bucket together or take it apart.
Tip: Always check the orientation of the diagram. Make sure you know which side is the front of the bucket.
Symbols and Labels
Diagrams use symbols and labels to make things easy to understand. Each part of the bucket has a label with its name. Common symbols include arrows for movement and circles for connection points. Some diagrams use numbers or letters to match parts with a list. You might see a table next to the diagram. This table gives you extra details, like part numbers or sizes.
Symbol | Meaning |
|---|---|
➡️ | Direction/Movement |
● | Pin/Connection |
# | Part Number |
If you follow the symbols and labels, you can use the diagram as a quick installation guide. This helps you avoid mistakes during assembly.
Step-by-Step Guide
You can read a bucket diagram by following these steps:
Find the title or legend. This tells you what the diagram shows.
Look at the main parts of the bucket. Identify the shell, teeth, and pins.
Match each label or symbol to the part on the diagram.
Use the table or list to check part numbers and sizes.
Follow the arrows to see how the parts fit together.
Common Pitfall: Do not skip the legend. Missing a symbol can lead to confusion.
If you take your time and use the diagram as your installation guide, you will avoid common mistakes. You will also learn how each part of the bucket works with the rest of the excavator.
Measurement and Size Charts
Key Dimensions
When you look at an excavator bucket diagram, you see several important measurements. You need to know the width, height, and depth of the bucket. The width measures the distance from one side of the bucket to the other. The height shows how tall the bucket stands from the base to the top. The depth tells you how far the bucket goes from the front edge to the back. You can use a tape measure or check the diagram for these numbers. These key dimensions help you choose the right bucket for your excavator.
To calculate excavator bucket capacity, you use these measurements. You multiply the width, height, and depth, then adjust for the bucket’s shape. Most diagrams show where to measure each part. If you measure carefully, you get the best fit for your machine and job.
Tip: Always double-check your measurements on the diagram before you order a new bucket.
Using Size Charts
An excavator bucket size chart makes your job much easier. You find these charts in manuals or online. The chart lists different bucket sizes and matches them to specific excavator models. You look up your machine, then see which buckets fit. Many charts also show the best bucket for certain jobs, like digging or loading.
You can print out a size chart and use it as a quick guide in the field. Some charts include extra details, such as material weight and type, to help you pick the right bucket. If you want to save time, always keep an excavator bucket size chart nearby. This tool helps you avoid mistakes and makes sure you get the right bucket every time.
Note: Using a size chart helps you match the bucket to your excavator and the job’s needs.
Bucket Size | Excavator Model | Best Use |
|---|---|---|
18 inches | Mini | Trenching |
24 inches | Standard | General digging |
36 inches | Large | Loading |
Types of Excavator Buckets
Common Bucket Types
You will find many types of excavator buckets on the market. Each type works best for a certain task. When you know the main types of excavator buckets, you can pick the right one for your work.
General Purpose Bucket: This bucket handles most digging and loading jobs. You can use it for soil, sand, or gravel.
Trenching Buckets: These buckets have a narrow shape. You use trenching buckets to dig deep, straight trenches for pipes or cables. Trenching buckets give you clean, even cuts in the ground.
Heavy Duty Buckets: You need heavy duty buckets for tough jobs. These buckets have thick steel and extra wear plates. Heavy duty buckets work well in rocky or hard soil.
Rock Bucket: This bucket has strong teeth and extra protection. You use it to move rocks or break up hard ground.
Clean-Up Bucket: This bucket has a wide, smooth edge. You use it to clear loose material or finish grading.
Tip: Always match the bucket to your job site conditions. The right bucket makes your work faster and safer.
Choosing the Right Bucket
You must look at your job before you choose the right excavator bucket. Think about the soil, the size of the trench, and the type of material you will move. If you need to dig narrow trenches, pick trenching buckets. For hard or rocky ground, use heavy duty buckets. When you work in soft soil, a general purpose bucket may be enough.
A table can help you compare the types of excavator buckets:
Bucket Type | Best Use |
|---|---|
General Purpose | Soil, sand, gravel |
Trenching Buckets | Digging trenches |
Heavy Duty Buckets | Rock, hard soil |
Rock Bucket | Moving rocks |
Clean-Up Bucket | Finishing, grading |
You should always check your excavator’s size and the job site conditions. This helps you avoid damage and get the best results. When you choose the right excavator bucket, you save time and money on every project.
Maintenance and Part Identification
Using Diagrams for Maintenance
You can use an excavator bucket diagram to make your maintenance tasks easier. The diagram shows you every part of the bucket, so you know what to check during your inspection. If you see a worn tooth or a loose pin, you can find it quickly on the diagram. This helps you follow your maintenance schedule and avoid missing important steps. You can also use the diagram to plan repairs. When you know where each part sits, you can remove and replace it without confusion.
Tip: Keep a printed diagram near your work area. It helps you spot problems before they get worse.
Finding Part Numbers
A good bucket diagram includes part numbers for each component. You can match the number on the diagram to the part you need to order. This saves you time and prevents mistakes. If you need a new tooth or pin, you just look up the number and tell your supplier. Many diagrams also show serial numbers. These numbers help you track which parts fit your specific bucket model.
Part Name | Part Number | Location on Diagram |
|---|---|---|
Tooth | 12345 | Front edge |
Pin | 67890 | Linkage |
Side Cutter | 11223 | Side of bucket |
Note: Always double-check the part number before you order. This keeps your maintenance schedule on track.
Grease Points and Upkeep
You need to keep your bucket in good shape by greasing the right spots. The diagram highlights grease points, so you know where to apply lubricant. Greasing pins and bushings helps your bucket move smoothly and last longer. If you skip these steps, parts can wear out faster. You should follow your maintenance schedule and check grease points often.
Look for circles or arrows on the diagram. These symbols show you where to grease.
Wipe away dirt before you add grease. This keeps the bucket clean and working well.
Regular upkeep makes your bucket safer and more reliable for every job.
Integration with Excavator Systems
Bucket and Hydraulic System
It is important to know how the bucket works with the hydraulic system. The hydraulic system moves the bucket so you can dig and lift. New excavators have special hydraulic features. These features help the machine work better and last longer.
The hydraulic system has a special reel and extra solenoid valves. These parts help less oil go back to the tank. This makes your excavator work more efficiently.
Strong steel supports and bushings make the front attachment tougher. These features help your bucket last longer, even on hard jobs.
A thermal spray coating covers where the arm and bucket touch. This coating helps stop wear and takes in shocks. It keeps your excavator in good shape.
HN bushings in the joint pins keep grease inside. You do not need to add grease as often. This saves you time on maintenance.
Many excavators use hydraulic systems from other countries. These systems let you control the bucket smoothly and exactly.
When you follow the installation guide, you see how the hydraulic system connects to the bucket. This setup helps your excavator work its best and run smoothly.
Tip: Check the hydraulic connections and grease points often. This keeps your excavator working well.
Boom and Stick Connection
The way the bucket, boom, and stick connect is very important. This connection helps you use your excavator safely and easily. There are different ways to link these parts together.
Bucket links join the bucket to the arm and boom. These links let the bucket move when you use the controls.
There are upper and lower bucket links. The upper link connects the top of the bucket to the arm. The lower link connects the bottom of the bucket to the base of the arm.
Some excavators have bucket tilt links. These links let you tilt the bucket for better digging.
Big excavators may use a double-link system with a triangle shape. This design gives you more power and better control.
Links can be welded or bolted on. Some machines have quick couplers. These let you change buckets or tools quickly.
Connecting rods or tie rods help keep the boom, arm, and bucket steady. These rods are made by forging or casting. They make your excavator strong and safe.
You should check these connections often. Add grease to moving parts and make sure bolts are tight. This helps your excavator stay ready for any job.
Common Mistakes
When you work with an excavator bucket diagram, you might make some common mistakes. Knowing these mistakes helps you avoid problems and keeps your machine running well.
Misreading Diagrams
You may look at a diagram and think you understand it, but small errors can lead to big issues. Sometimes, you might mix up the front and back of the bucket. You could also confuse the left and right sides. Always check the diagram’s legend and labels before you start. If you skip this step, you might install a part in the wrong place. Take your time and double-check each part on the diagram.
Tip: Use a highlighter or colored pen to mark important parts on your printed diagram. This makes it easier to follow each step.
Overlooking Small Parts
Many people focus only on the large parts of the excavator bucket. You might forget about pins, bushings, or small wear plates. These small parts play a big role in how your bucket works. If you miss a worn pin or a loose bushing, your excavator could break down. Always inspect every part, no matter how small it seems.
Check for missing or damaged pins.
Look for worn bushings.
Inspect all grease points.
A simple checklist can help you remember each part during your inspection.
Matching Parts to Your Machine
Not every bucket or part fits every excavator. You need to match the parts to your exact machine model. If you use the wrong part, you risk damaging your excavator or causing safety problems. Always use the diagram and the size chart to check part numbers. Make sure the bucket and all its parts fit your machine before you start any work.
Step | What to Do |
|---|---|
Check part numbers | Compare with your machine manual |
Use size charts | Confirm bucket compatibility |
Ask for help | Contact your dealer if unsure |
Remember, the right part keeps your excavator safe and working well.
Knowing how to read excavator bucket diagrams helps you measure parts. It also helps you keep your machine working well. You can choose the right tools for each job. Diagrams and size charts make repairs easier. They help you avoid making mistakes. Try to look at these diagrams often. This will help you feel more sure of yourself. You will also stay safe when using your excavator.
Remember, learning about your excavator begins with knowing each bucket part.
FAQ
What is the most important part of an excavator bucket diagram?
You should focus on the labeled parts. These labels help you find and identify each part quickly. The diagram shows you where everything fits. This makes repairs and maintenance much easier.
How do you know which bucket fits your excavator?
You can use a size chart. Match your excavator model to the chart. Check the width, height, and pin size. Always double-check part numbers before you buy a new bucket.
Why do you need to grease pins and bushings?
Greasing pins and bushings keeps them moving smoothly. This reduces wear and helps your bucket last longer. You should follow the maintenance schedule in your manual.
Can you replace bucket teeth by yourself?
Yes, you can replace bucket teeth with basic tools. Use the diagram to find the correct tooth and adapter. Always wear gloves and follow safety steps.
Where can you find part numbers for replacement parts?
You can find part numbers on the bucket diagram or in your machine’s manual. These numbers help you order the right parts from your dealer or supplier.