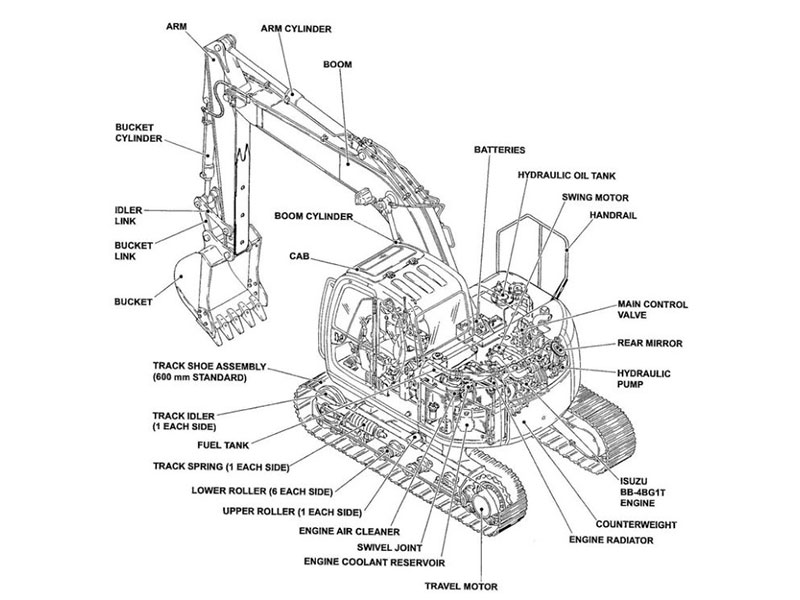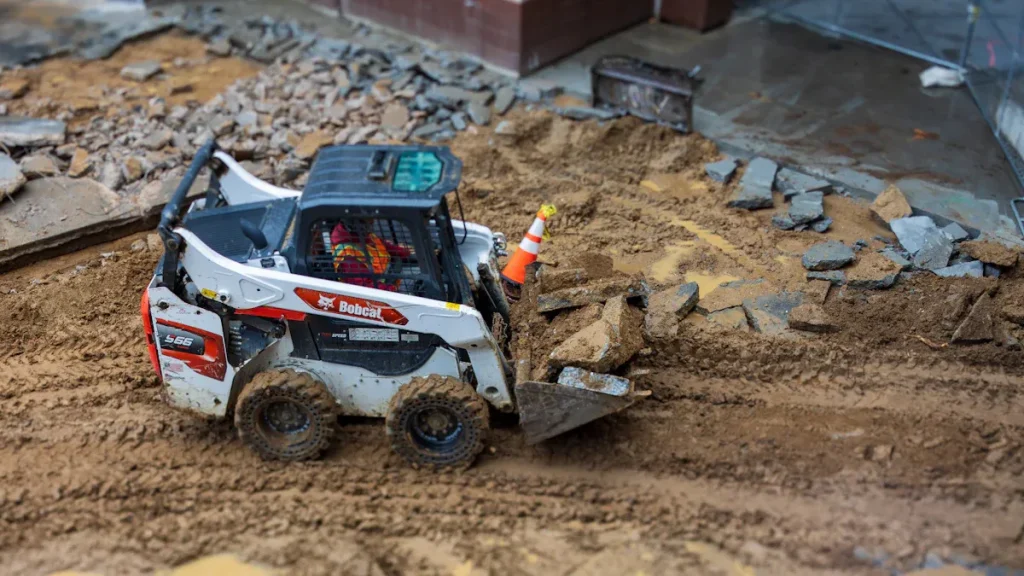
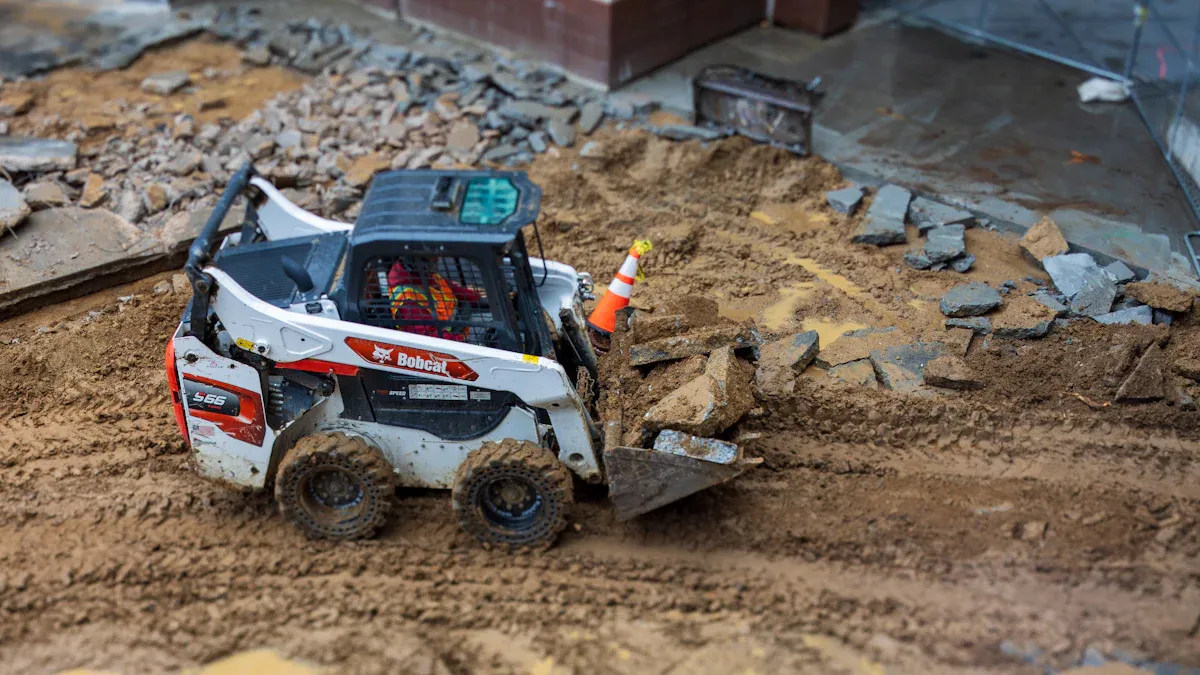
When fixing your Bobcat excavator, a bobcat excavator parts diagram is very helpful. These diagrams show clear pictures of each part, allowing you to find and name parts easily. This ensures you fix or replace the correct parts. Whether you’re an expert or enjoy DIY projects, learning how to read these diagrams saves time and avoids mistakes. It also helps your machine last longer. Knowing how to use a bobcat excavator parts diagram gives you control, making repairs and maintenance much easier and faster.
Key Takeaways
Bobcat excavator diagrams help you find parts fast. This saves time and ensures you get the right replacements.
Using diagrams for regular care can make your excavator last longer. Check fluids and filters to stop problems before they happen.
Diagrams with exploded views show how parts connect. They make repairs easier and help avoid mistakes.
Always check part numbers before buying. This makes sure you get the correct parts and avoid wasting money.
Keep diagrams neat and easy to find. An organized system helps you quickly get the info you need.
Why Bobcat Excavator Parts Diagrams Are Important
Bobcat excavator parts diagrams are more than just pictures. They act like a guide to help you understand your machine. Whether fixing or maintaining it, these diagrams make things easier. Let’s see why they are so important.
Making Repairs Easier with Clear Part Identification
When your excavator breaks, finding the problem can be hard. A parts diagram removes the confusion. It shows all parts clearly, so you can find them fast. Each part has a number or code to match with a catalog. This helps you order the right part, saving time and effort.
For example, if a hydraulic cylinder breaks, the diagram shows where it is. It also shows how it connects to other parts. This makes fixing it quicker and avoids mistakes. Using the diagram, you can repair confidently without guessing.
Helping Prevent Problems for Longer Machine Life
Taking care of your excavator helps it last longer. Parts diagrams are very useful for this. They show how parts work together, helping you spot problems early.
For instance, the diagram helps you check important areas like the engine. You can follow it to replace filters or add oil to moving parts. This keeps your machine working well and avoids sudden breakdowns.
Saving Time in Troubleshooting and Repairs
Finding problems in your machine can take a long time. A parts diagram makes it faster by showing how everything fits. You can follow it step by step to find the issue.
For example, if there’s an electrical problem, the diagram shows the wires. This helps you fix it without guessing. It also ensures you put everything back correctly after repairs.
Using these diagrams saves time and teaches you about your machine. This makes repairs and maintenance easier, whether you’re a pro or just learning.
Key Parts of a Bobcat Excavator Diagram
Why Part Numbers Matter
Part numbers are like ID tags for your excavator. Each part has its own number to help you find it fast. These numbers make sure you buy the right replacement parts. For example, if you need a hydraulic pump, the number ensures it fits your machine. Without it, you might get a part that doesn’t work.
You’ll see part numbers next to parts in the diagram. They match catalogs or online stores where you can check stock. Keeping these numbers helps you track repairs and plan future fixes easily.
Reading Symbols, Labels, and Notes
Symbols, labels, and notes in diagrams are like a map. They show how parts work together and where they go. Arrows might show movement, and labels explain connections like screws or bolts.
Look at notes carefully—they often give important tips. These might include how tight to make bolts or other assembly advice. If a symbol confuses you, check the legend or key. This helps you understand the diagram and avoid mistakes.
Using Exploded Views for Repairs
Exploded views are super helpful in diagrams. They show parts pulled apart but still in order. This helps you see how to take things apart and put them back.
For example, factories use exploded views to guide workers during assembly. These diagrams have clear pictures and steps to follow.
Feature | Explanation |
|---|---|
Process Type | Disassembly means taking parts apart without breaking them. |
Reversibility | If parts can’t go back together, it’s called dismantling. |
When fixing your Bobcat, use exploded views to see part order. This avoids mix-ups and ensures proper reassembly. Following the diagram makes even tricky repairs easier.
Step-by-Step Guide to Using Bobcat Excavator Parts Diagrams
Finding the Right Diagram for Your Excavator Model
First, get the correct diagram for your Bobcat excavator. Each model has different parts, so using the wrong diagram can cause mistakes. Find your machine’s model number on a metal plate near the seat or on the frame. Once you have the number, look for the matching Bobcat excavator parts diagram in a catalog or online.
Bobcat and other companies often have diagrams on their websites. These are sorted by model and year, making them easy to find. For older models, you may need to contact a dealer or check old catalogs. Keeping the right diagram handy helps you work faster and avoid delays during repairs.
Identifying Faulty Components Using the Diagram
After finding the right diagram, use it to locate broken parts. A Bobcat excavator parts diagram shows every part and how they connect. For example, if there’s a hydraulic leak, the diagram shows where the hydraulic cylinder is and its related parts.
To find problems, follow these steps:
Look at what’s wrong with the machine.
Use the diagram to check the problem area.
Inspect each part in the order shown.
Test parts to see if they work.
Fix or replace the broken part.
Put everything back together using the diagram.
Reliability Principle | Why It Matters |
|---|---|
Part Testing | Makes sure each part works properly. |
System Checks | Helps find problems by following a clear process. |
Using the diagram and these steps makes repairs easier and faster.
Cross-Referencing Part Numbers for Replacements
Once you know the broken part, check its part number to order the right replacement. Each part in the diagram has a unique number that matches the catalog. This ensures you get the correct part and avoid errors.
Cross-referencing part numbers has many advantages:
Saves Money: Fewer part numbers mean lower costs.
Better Compatibility: One number can work for similar parts.
Saves Time: Ordering is quicker and simpler.
Easier Inventory: Tracking parts is more organized.
Accurate Repairs: Using the right part improves repair success.
Eco-Friendly: Reusing parts reduces waste.
Benefit | Explanation |
|---|---|
Saves Money | Fewer part numbers lower inventory costs. |
Better Compatibility | One number works for similar parts. |
Saves Time | Speeds up the ordering process. |
Easier Inventory | Makes tracking parts simpler. |
Accurate Repairs | Ensures the right part is used for fixes. |
Eco-Friendly | Promotes reusing parts to cut waste. |
Always double-check the part number with the diagram and catalog before ordering. This step avoids mistakes, saves time, and keeps repairs on track.
Using Diagrams to Put Parts Back Together
Putting parts back together can seem tricky, especially with machines like a Bobcat excavator. But a parts diagram makes it easier and helps you do it right. By following the diagram step by step, you can avoid errors and get your machine working again.
Steps to Reassemble Parts Using a Diagram
Set Up Your Workspace
Before starting, arrange all the parts you took apart. Lay them out in the same order as shown in the diagram. This helps you keep track of everything and avoids losing small items like screws or washers.Tip: Use small containers or trays to sort parts by size or type. This keeps things neat and easy to find.
Check the Exploded View
Look at the exploded view in the diagram. It shows how each part fits together. Pay close attention to the order and direction of the parts. For example, if fixing a hydraulic pump, the diagram shows where seals and gaskets go.Read Labels and Notes
Diagrams often include notes or labels with instructions. These might tell you how tight bolts should be or how to align gears. Read these carefully to avoid mistakes.Test Fit Before Final Assembly
Put the parts together loosely first to check if they fit. This helps you catch mistakes before tightening bolts or using glue.Secure Everything Correctly
Once you’re sure everything is in the right place, secure the parts as the diagram shows. Use the right tools and follow any instructions about bolt tightness.
Mistakes to Watch Out For
Skipping Steps: Always follow the order in the diagram. Skipping steps can cause parts to not fit or break.
Tightening Bolts Too Much: Tighten bolts only as much as the diagram says. Overdoing it can damage threads or crack parts.
Ignoring Notes: Notes in the diagram often have important details. Missing them can lead to assembly problems.
Why Doing It Right Matters
Putting parts together correctly keeps your excavator safe and working well. Misaligned parts can wear out faster and cost more to fix. Using the diagram as a guide helps you avoid these problems and keeps your machine running longer.
Note: If you’re unsure about any step, check the service manual or ask a professional for help. It’s better to ask than risk breaking your machine.
Using a Bobcat excavator parts diagram for reassembly saves time and builds your repair skills. With practice, you’ll find it gets easier every time.
Troubleshooting Challenges with Bobcat Excavator Diagrams
Fixing Confusing Symbols or Labels
Sometimes, diagrams have symbols or labels that seem unclear. Overlapping icons or messy notes can make them hard to read. To fix this, focus on how the labels and symbols are placed.
For example, placing labels neatly makes them easier to read. Using clear fonts helps text stand out, even in crowded spots. Special tools can arrange icons to avoid overlap and keep things tidy. Aligning labels with icons also makes parts easier to find.
Method | What It Does |
|---|---|
Neat Label Placement | Clear fonts make labels easier to read. |
Icon Arrangement Tools | Keeps symbols from overlapping and aligns them with labels. |
Label-Icon Alignment | Ensures labels and icons match for better understanding. |
If symbols confuse you, check the legend or key. This will help you understand what each symbol means and avoid mistakes.
Finding Diagrams for Older Models
Getting diagrams for old Bobcat models can be tricky. Some manufacturers don’t keep these diagrams online anymore. But there are ways to find them.
First, ask a Bobcat dealer. They often have old diagrams saved and can share them. You can also check online forums where people post diagrams for older machines. These communities are great for finding rare resources.
If those don’t work, buy a service manual for your model. Manuals usually include diagrams and repair steps. Keeping a copy, either printed or digital, ensures you always have it when needed.
Avoiding Mistakes with Exploded Views
Exploded views are helpful but can be misunderstood. A common mistake is thinking the parts are shown to scale. In reality, the spacing is stretched to show how parts fit together.
To avoid errors, focus on the order of the parts, not their size. Follow the sequence shown to assemble them correctly. Don’t ignore small pieces like washers or seals. These tiny parts are important for the machine to work properly.
Before starting, compare the exploded view with the actual parts. This helps you spot any differences and ensures the repair goes smoothly.
Practical Tips for Using Parts Diagrams Effectively
Keeping Diagrams Neat and Easy to Find
Organizing your Bobcat excavator parts diagrams helps you find them fast. A tidy system saves time and avoids stress during repairs. Use binders with clear sleeves or vertical storage racks to keep diagrams safe. Label each one with the model number and year so you can grab the right one quickly.
You can also try the 5S method to organize your workspace. This means sorting, arranging, cleaning, standardizing, and keeping it that way. For example, store diagrams in folders or cabinets. Place the ones you use most often nearby, and keep others further away.
Tip: Scan your diagrams and save them online. Cloud storage keeps them safe even if paper copies get damaged.
Using Diagrams with Manuals for Better Repairs
Pairing parts diagrams with your Bobcat manual makes repairs easier. Diagrams show how parts fit, while manuals explain how to fix them. Together, they give you a complete guide for maintenance and repairs.
For example, systems like Oracle CMRO let you store diagrams and manuals in one place. This gives you quick access to accurate information when fixing your machine. These systems also have templates to make tasks faster and simpler.
Feature/Benefit | What It Does |
|---|---|
Centralized Storage | Keeps diagrams and manuals together for easy access. |
Instant Information | Helps you find accurate details quickly. |
Task Templates | Speeds up work by reusing steps for similar repairs. |
Using both diagrams and manuals ensures you follow the right steps and avoid mistakes.
Finding Help Online for Extra Tips
The internet is full of resources to help with parts diagrams. Bobcat’s website has diagrams sorted by model and year. You can also watch videos or join forums where experts share repair tips.
When searching online, stick to trusted websites for accurate information. Save helpful pages or download diagrams to use offline. If you’re stuck, online communities can answer your questions quickly.
Note: Always double-check online advice with your manual or official diagrams to make sure it’s correct.
By staying organized, using manuals, and exploring online tools, you’ll get the most out of your parts diagrams and make repairs easier.
Using Diagrams for Real Repairs
Changing a Hydraulic Cylinder with a Diagram
Switching out a hydraulic cylinder is easier with diagrams. First, find the cylinder in the diagram. It shows where it is and how it connects to other parts. Follow these steps to replace it:
Get Your Tools Ready
Gather wrenches, gloves, and the new cylinder. Check the diagram for any special tools you might need.Remove the Old Cylinder
Look at the diagram to find bolts and hoses attached to the cylinder. Loosen them slowly to avoid breaking nearby parts.Attach the New Cylinder
Line up the new cylinder as shown in the diagram. Tighten the bolts and reconnect the hoses.Test Everything
Start the machine and check for leaks or misalignment. The diagram helps you confirm all parts are in the right place.
Tip: Keep the diagram close while working. It helps you avoid mistakes and finish faster.
Fixing Electrical Problems with Diagram Help
Electrical issues can be tough, but diagrams make them simpler. They show how wires connect and where they go. Use the diagram to solve the problem step by step:
Check the Wires
Look for broken wires or loose ends. The diagram shows where each wire should lead.Test the Parts
Use a multimeter to see if switches or relays work. Compare your results with the diagram to find broken parts.Repair or Replace
Fix damaged wires or swap out broken parts. Follow the diagram to reconnect everything properly.
Note: Be careful with electrical repairs. Always turn off the power before touching wires.
Doing Regular Maintenance with Diagram Support
Regular maintenance keeps your excavator in good shape. Diagrams help you find the parts that need care. Follow these steps for easy maintenance:
Check Filters and Fluids
Use the diagram to locate oil filters, air filters, and fluid tanks. Replace filters and refill fluids as needed.Look at Moving Parts
Inspect gears, belts, and other parts shown in the diagram. Clean and oil them to prevent wear.Tighten Loose Bolts
Find important bolts in the diagram. Tighten them to stop parts from coming loose during use.
Tip: Regular care makes your excavator last longer and saves money on repairs.
Learning to use Bobcat excavator parts diagrams makes repairs easier. These diagrams show how parts connect, helping you spot problems early and fix them right. Knowing part numbers and notes improves your work and keeps your machine dependable.
Benefit | Explanation |
|---|---|
Understanding Exploded Views | Shows how parts fit, making repairs and maintenance simpler. |
Knowledge of Part Numbers | Helps you find the right parts quickly and easily. |
Importance of Annotations | Gives important tips for safe and accurate repairs. |
Safety Assurance | Ensures all parts work properly, lowering accident risks. |
Preventive Maintenance | Finds worn parts early to avoid bigger problems later. |
Tip: Use diagrams often to get better at repairs. This saves time and helps your machine last longer.
FAQ
How can I find the right Bobcat excavator parts diagram?
Look for the model number on your excavator’s frame or seat. Use this number to search diagrams on Bobcat’s website or catalogs. For older machines, ask a dealer or check online forums for help.
Can Bobcat parts diagrams help with regular maintenance?
Absolutely! Diagrams show how parts fit and work together. Use them to find filters, belts, and other parts needing care. This helps you catch problems early and avoid expensive repairs.
How do exploded views make repairs easier?
Exploded views show parts taken apart step by step. They help you disassemble and reassemble correctly. Follow the order to avoid losing small pieces like washers or seals.
What if I don’t understand a symbol in the diagram?
Check the legend or key that comes with the diagram. It explains symbols and labels. If there’s no legend, look in the service manual or ask an expert for help.
Are Bobcat parts diagrams free online?
Yes, many diagrams are free on Bobcat’s website, organized by model and year. For older models, you might need to buy a service manual or ask a dealer for assistance.