Have you ever looked at an old excavator bucket and wondered if it could serve a new purpose? With a bit of creativity, you can turn it into a one-of-a-kind excavator bucket wood stove. This project combines functionality with a rugged, industrial charm that’s hard to beat. Imagine the warmth of a fire glowing inside something that once dug through earth and rock. It’s not just a stove—it’s a conversation starter and a testament to your DIY skills. Plus, repurposing materials like this helps reduce waste while creating something truly unique.
Key Takeaways
Gather essential tools and materials, including an angle grinder, welding machine, and a clean excavator bucket, to ensure a smooth DIY process.
Prioritize safety by using protective gear such as welding helmets, gloves, and safety goggles while working on your wood stove.
Modify the excavator bucket by cutting openings for a door and chimney, and welding hinges and handles for functionality.
Assemble the stove with a stable base or legs, and consider applying high-temperature paint for a polished finish.
Test your stove outdoors with a small fire to check airflow and functionality, making adjustments as needed for optimal performance.
Regularly maintain your stove by cleaning out ash, inspecting for rust, and ensuring proper ventilation to prevent carbon monoxide buildup.
Get creative with customizations like decorative cutouts or cooking surfaces to enhance both the aesthetic and functionality of your wood stove.
Step 1: Gather Tools, Materials, and Safety Gear
Before diving into the project, you need to gather the right tools, materials, and safety gear. Having everything ready will make the process smoother and safer. Let’s break it down step by step.
Tools Required for the Project
To transform an excavator bucket into a wood stove, you’ll need a few essential tools. These will help you cut, shape, and assemble the components effectively:
Angle grinder with cutting and grinding discs: This tool is perfect for cutting through metal and smoothing out rough edges. It’s a must-have for this project.
Welding machine and safety gear: You’ll use this to join metal pieces securely. Make sure your welding gear includes a helmet and gloves for protection.
Drill with metal bits: A drill will help you create precise holes for hinges, handles, or other attachments.
Measuring tape and marker: These are essential for marking accurate measurements before cutting or drilling.
Having these tools on hand ensures you can handle every step of the process with ease.
Materials for Your Excavator Bucket Wood Stove
The materials you choose will determine the durability and functionality of your stove. Here’s what you’ll need:
Excavator bucket (clean and rust-free): This will serve as the main body of your wood stove. Make sure it’s in good condition to avoid structural issues.
Steel plates or scrap metal for modifications: These will be used to create the door, chimney, or any additional components.
Hinges and handles for the door: These small additions make the stove practical and easy to use.
High-temperature paint (optional): If you want a polished look, this paint can withstand the heat and add a professional finish.
Repurposing an excavator bucket not only gives it a new life but also creates a unique and functional piece for your space.
Essential Safety Equipment
Safety should always come first when working on a DIY project like this. Protect yourself with the following gear:
Welding helmet and gloves: These protect your face and hands from sparks and heat while welding.
Safety goggles and ear protection: Cutting and grinding metal can produce debris and loud noise. Goggles shield your eyes, and ear protection reduces noise exposure.
Fire extinguisher and proper ventilation: Always keep a fire extinguisher nearby in case of emergencies. Work in a well-ventilated area to avoid inhaling harmful fumes.
For added safety and comfort, consider using items like an air purifier to improve air quality or a safety gate to keep the stove area secure once it’s in use. These small steps can make a big difference in ensuring a safe and enjoyable experience.
By gathering these tools, materials, and safety gear, you’re setting yourself up for success. With preparation complete, you’ll be ready to move on to the next step in building your excavator bucket wood stove.
Step 2: Modify the Excavator Bucket

Now that you’ve gathered your tools and materials, it’s time to roll up your sleeves and start modifying the excavator bucket. This step transforms the bucket into a functional wood stove. Follow these instructions to ensure a smooth process.
Preparing the Bucket for Modification
Before adding any components, you need to prepare the bucket. This involves marking and cutting specific sections.
Mark the opening for the stove door and chimney.
Start by deciding where the stove door and chimney will go. Use a marker and measuring tape to outline the areas. The door should be large enough to load wood easily, while the chimney should allow proper airflow. Keep the placement practical and balanced for stability.
Pro Tip: Use masking tape to create clean, straight lines before marking. This helps you visualize the final design and ensures precision.
Use the angle grinder to cut out the marked sections.
Once you’ve marked the openings, grab your angle grinder. Carefully cut along the lines you’ve drawn. Take your time to avoid mistakes. The grinder will create sparks, so wear your safety goggles and gloves. After cutting, inspect the edges to ensure they’re smooth and even.
Cutting metal can be noisy and messy. Work in a well-ventilated area and use ear protection to stay comfortable.
Adding Functional Components
With the openings ready, it’s time to add the parts that make your excavator bucket wood stove functional.
Weld hinges and a handle to create a functional door.
Attach hinges to the bucket where you’ve cut the door opening. Use your welding machine to secure them firmly. Then, weld a handle to the door for easy opening and closing. Test the door to ensure it swings smoothly and seals properly when shut.
A sturdy door is essential for controlling airflow and maintaining safety. Double-check your welds to avoid weak spots.
Attach a steel pipe or pre-made chimney to the top or back of the bucket.
Next, install the chimney. Use a steel pipe or a pre-made chimney piece that fits your design. Weld it securely to the bucket’s top or back, depending on your preference. The chimney directs smoke away and improves airflow, which is crucial for efficient burning.
Ensure the chimney is straight and free of obstructions. A poorly aligned chimney can affect the stove’s performance.
Finishing Touches
Before moving on to assembly, take care of the final details to ensure safety and functionality.
Grind down sharp edges for safety.
After cutting and welding, you’ll likely have sharp edges on the bucket. Use the angle grinder with a grinding disc to smooth these areas. This step prevents injuries and gives your stove a polished look.
Clean the bucket thoroughly to remove debris and residue.
Finally, clean the entire bucket. Remove any metal shavings, dust, or grease left from the modification process. A clean surface ensures better performance and reduces the risk of fire hazards.
Cleaning also prepares the bucket for painting if you choose to apply high-temperature paint later.
By completing these modifications, you’ve laid the foundation for a durable and functional excavator bucket wood stove. The next step will bring everything together as you assemble and test your creation.
Step 3: Assemble and Test the Wood Stove
You’ve modified the excavator bucket and prepared it for its new life as a wood stove. Now comes the exciting part—assembling and testing your creation. This step ensures your stove is stable, functional, and ready to use.
Final Assembly Steps
Attach additional components, such as legs or a base for stability.
Stability is key when using your excavator bucket wood stove. Adding legs or a sturdy base will keep it secure during operation. Use steel rods or scrap metal to create legs. Weld them firmly to the bottom of the bucket, ensuring they’re evenly spaced for balance. If you prefer a base, attach a flat steel plate beneath the bucket. This provides extra support and prevents tipping.
Tip: Test the stability by gently rocking the stove after attaching the legs or base. If it wobbles, adjust the components until it stands firm.
Apply high-temperature paint for a polished finish (optional).
If you want your stove to look as good as it works, consider applying high-temperature paint. This paint not only enhances the appearance but also protects the metal from rust and heat damage. Choose a color that complements your style, and apply the paint in thin, even coats. Let it dry completely before moving on to testing.
Pro Tip: Use a heat-resistant primer before painting for better adhesion and durability.
Testing the Functionality
Place the stove in a safe, outdoor area for testing.
Safety should always come first. Set up your stove in an open, outdoor space away from flammable materials. Ensure the area has proper ventilation to allow smoke to disperse. Place the stove on a non-flammable surface, like concrete or gravel, to prevent accidents.
Remember: Never test your stove indoors or in enclosed spaces. Proper airflow is crucial for safe operation.
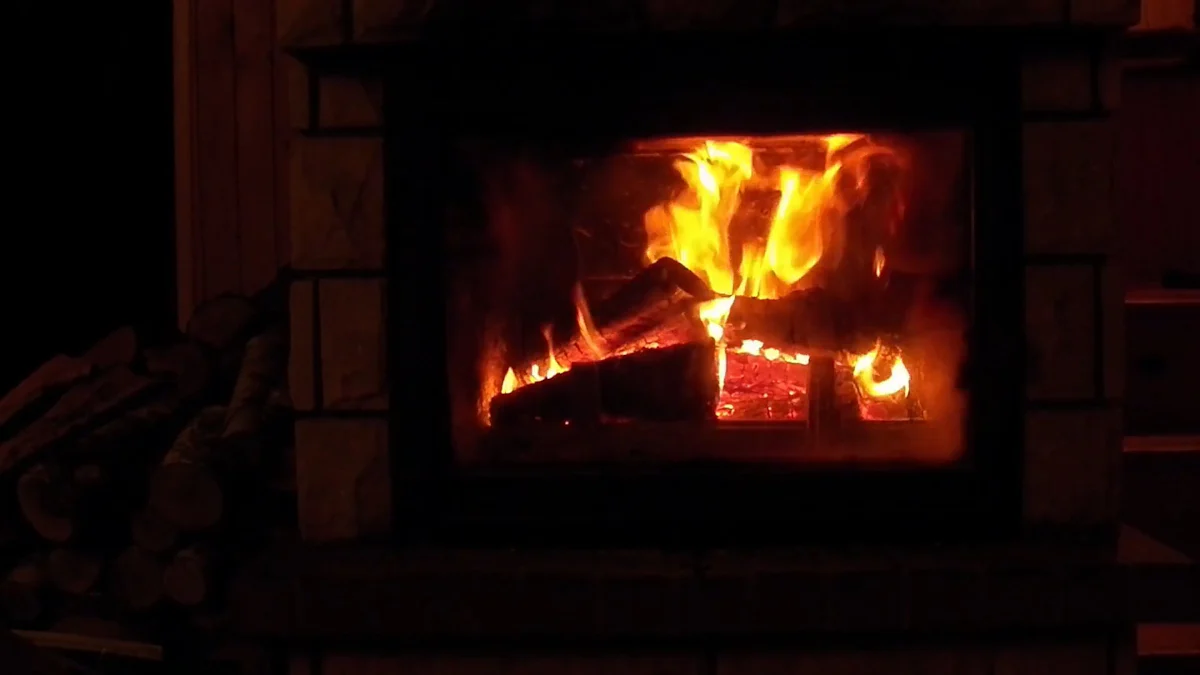
Light a small fire to check airflow and functionality.
Start with a small fire to test how well your stove performs. Use dry, cured wood for the best results. Light the fire and observe the airflow through the door and chimney. The flames should burn steadily, and smoke should exit smoothly through the chimney. If everything works as expected, your stove is ready for use.
Fun Fact: Many DIY enthusiasts prefer side-loading stoves for easier wood placement and better cooking options.
Troubleshooting Common Issues
Adjust the door or chimney if airflow is insufficient.
If the fire struggles to stay lit or smoke doesn’t flow properly, check the door and chimney. A poorly sealed door can disrupt airflow, so tighten the hinges or add a gasket for a better seal. If the chimney isn’t drawing smoke effectively, inspect it for blockages or misalignment. Adjust as needed to improve performance.
Quick Fix: A slightly larger chimney opening can enhance airflow if the current setup feels restrictive.
Reinforce any weak welds or connections.
During testing, you might notice weak spots in your welds or connections. Address these immediately to ensure safety and durability. Re-weld any loose components and double-check the stability of the legs or base. Strong welds are essential for long-term use and reliable performance.
Lesson Learned: Many DIYers find that reinforcing welds early prevents bigger issues down the line.
By following these steps, you’ll have a fully functional excavator bucket wood stove that’s safe, efficient, and uniquely yours. Testing and troubleshooting might take some time, but the effort ensures your stove performs at its best.
Safety Tips for Using Your Excavator Bucket Wood Stove
Safety should always be your top priority when using your excavator bucket wood stove. Following these tips will help you enjoy your stove while minimizing risks.
Safe Operation Practices
Always use the stove in a well-ventilated area.
Proper ventilation is essential when operating your stove. Burning wood produces smoke and fine particles, which can accumulate indoors and harm your health. Place your stove in an open space or near a window to ensure fresh air circulates. If you’re using it in a semi-enclosed area, consider installing a fan or vent to improve airflow. Studies have shown that poor ventilation can lead to elevated indoor wood smoke exposure, increasing the risk of respiratory issues. Keeping the air clean protects you and your family.
Tip: A carbon monoxide detector adds an extra layer of safety by alerting you to dangerous gas levels.
Avoid overloading the stove with wood.
Adding too much wood at once can cause the fire to burn inefficiently and produce excessive smoke. Stick to small, manageable amounts of wood to maintain steady airflow and consistent heat. Overloading can also lead to overheating, which may damage the stove or surrounding areas. By burning smaller loads, you’ll extend the life of your stove and reduce the risk of accidents.
Pro Tip: Use dry, seasoned wood for cleaner burns and less smoke.
Maintenance Guidelines
Clean out ash and debris after each use.
Ash buildup can block airflow and reduce your stove’s efficiency. After the fire has completely cooled, remove the ash and any leftover debris. Use a metal scoop or shovel to clean the interior, and dispose of the ash in a fireproof container. Regular cleaning not only improves performance but also prevents accidental fires caused by leftover embers.
Did You Know? Cleaning your stove regularly can also reduce indoor PM2.5 levels, which are tiny particles that can harm your lungs.
Inspect for rust or damage periodically.
Over time, exposure to heat and moisture can cause rust or wear on your stove. Check the bucket, hinges, and chimney for signs of corrosion or cracks. Address any issues immediately by sanding off rust or reinforcing weak spots with welding. Regular inspections ensure your stove remains safe and functional for years to come.
Quick Tip: Applying high-temperature paint can protect your stove from rust and extend its lifespan.
By following these safety tips, you’ll enjoy your excavator bucket wood stove with peace of mind. A little care and attention go a long way in keeping your stove safe, efficient, and ready for use whenever you need it.
Creative Customizations for Your Wood Stove
Once your excavator bucket wood stove is functional, why not make it uniquely yours? Adding custom touches can elevate its design and improve its usability. Let’s explore some creative ways to personalize and enhance your stove.
Personalizing the Design
Add decorative metal cutouts or designs.
You can transform your stove into a piece of art by incorporating decorative elements. Use metal cutouts or designs to give it a personal touch. For example, you could cut shapes like stars, trees, or geometric patterns into the door or sides of the stove. These cutouts not only add visual appeal but also allow the firelight to shine through, creating a warm and inviting glow.
Tip: If you’re new to metalwork, start with simple designs. Use a stencil and marker to outline your pattern before cutting with an angle grinder.
Some DIY enthusiasts have shared how their custom designs became conversation starters. One creator mentioned receiving countless compliments on their stove’s intricate patterns, even though they weren’t a professional metalworker. This proves that creativity and effort can go a long way in making your project stand out.
Enhancing Stove Functionality
Install a cooking surface or grill attachment.
Why stop at just heating? Add a cooking surface or grill attachment to turn your stove into a multi-functional masterpiece. A flat steel plate welded to the top of the bucket can serve as a cooking surface for pots and pans. Alternatively, you can attach a removable grill grate for barbecuing.
Pro Tip: Use heat-resistant materials for any cooking attachments to ensure durability and safety.
One DIYer shared how they used their stove to cook meals during camping trips. They welded a small grill attachment to the top, allowing them to prepare everything from coffee to grilled vegetables. This addition made their stove not just practical but also a key part of their outdoor adventures.
Add a heat shield for better efficiency.
A heat shield can improve your stove’s performance by directing heat where it’s needed most. Attach a curved metal plate to the back or sides of the bucket to reflect heat forward. This simple addition can make your stove more efficient, especially in colder environments.
Quick Fix: Use scrap metal for the heat shield to keep costs low while repurposing materials.
In tiny living spaces, heat efficiency matters. Many people in the tiny house community have shared how small adjustments, like adding heat shields, made their stoves more effective. These tweaks can help you get the most out of your creation while keeping your space warm and cozy.
Customizing your excavator bucket wood stove allows you to blend functionality with creativity. Whether you’re adding decorative designs or practical features, these enhancements make your stove truly one of a kind. So, grab your tools and let your imagination guide you!
Additional Safety Considerations
Preventing Carbon Monoxide Hazards
Ensure proper airflow to prevent carbon monoxide buildup.
Carbon monoxide (CO) is a silent danger when using wood stoves. It’s colorless, odorless, and can build up quickly if your stove doesn’t have proper airflow. To keep your space safe, ensure the chimney and vents are clear of blockages. A well-functioning chimney directs smoke and harmful gases outside, preventing them from lingering in your environment. Regularly check for obstructions like soot, creosote, or debris that could restrict airflow.
Did You Know? According to studies, wood-burning devices release harmful pollutants like carbon monoxide and nitrogen oxides, which can lead to respiratory issues if not properly managed. Keeping your stove ventilated reduces these risks significantly.
Position your stove in an area with good ventilation. If you’re using it in a semi-enclosed space, consider adding a fan or vent to improve air circulation. This simple step can make a big difference in maintaining clean air and reducing health risks.
Install a carbon monoxide alarm near the stove.
Even with proper precautions, it’s wise to have a backup safety measure. A carbon monoxide alarm acts as your first line of defense against CO exposure. Place the alarm near your stove but not directly above it, as heat can affect its performance. Test the alarm regularly to ensure it’s working correctly.
Pro Tip: Choose an alarm with a digital display to monitor CO levels in real time. This feature provides added peace of mind, especially during extended stove use.
By combining proper airflow with a reliable CO alarm, you create a safer environment for enjoying your wood stove.
Long-Term Safety Measures
Regularly inspect the stove for wear and tear.
Over time, heat and use can take a toll on your stove. Regular inspections help you catch small issues before they become major problems. Check the bucket, hinges, and chimney for signs of rust, cracks, or loose connections. Pay close attention to welds, as weak spots can compromise the stove’s stability and safety.
Fun Fact: In Washington, wood smoke has been identified as a significant source of air pollution, contributing to respiratory illnesses. Keeping your stove in good condition minimizes emissions and promotes cleaner air.
If you notice any damage, address it immediately. Sand off rust, tighten loose parts, or re-weld weak areas. These small maintenance tasks extend the life of your stove and keep it functioning efficiently.
Replace damaged components promptly.
Don’t wait to replace parts that show significant wear or damage. A broken hinge, warped door, or cracked chimney can affect your stove’s performance and safety. Use high-quality materials for replacements to ensure durability. For example, opt for heat-resistant steel when replacing structural components.
Quick Tip: Keep spare parts like hinges or screws on hand. This way, you can make quick repairs without delaying your stove’s use.
By staying proactive with inspections and repairs, you’ll enjoy a safer and more reliable wood stove for years to come.
Building an excavator bucket wood stove is more than just a DIY project—it’s a chance to create something functional, unique, and eco-friendly. By following the three simple steps of preparation, modification, and assembly, you can transform an old bucket into a durable stove that adds warmth and character to any space. Prioritizing safety and regular maintenance ensures your stove remains reliable for years to come. Don’t stop here—explore other creative ways to repurpose materials and bring new life to forgotten items. Your next project might just be another masterpiece waiting to happen!